By Chef Paprika
This article contains affiliate links. If you buy through them, itamae.fun may earn a small commission at no extra cost to you.
I’m Chef Paprika. I have worked as an itamae (a chef of Japanese cuisine) for 23 years, in ryotei (traditional high-end Japanese restaurants), a Michelin-starred restaurant and a members-only club, and I hold a fugu (pufferfish) license. In this guide I show you how I cut a raw tuna block into saku: the neat rectangular blocks you slice sashimi and sushi from.
Many guides start with a ready-made saku and explain how to slice it. This guide starts one step earlier: how to turn a larger block into saku, and how to read the direction of the sinew (suji) so your finished slices are tender, not stringy. That is what this article covers.
Why learn to cut saku from the block?
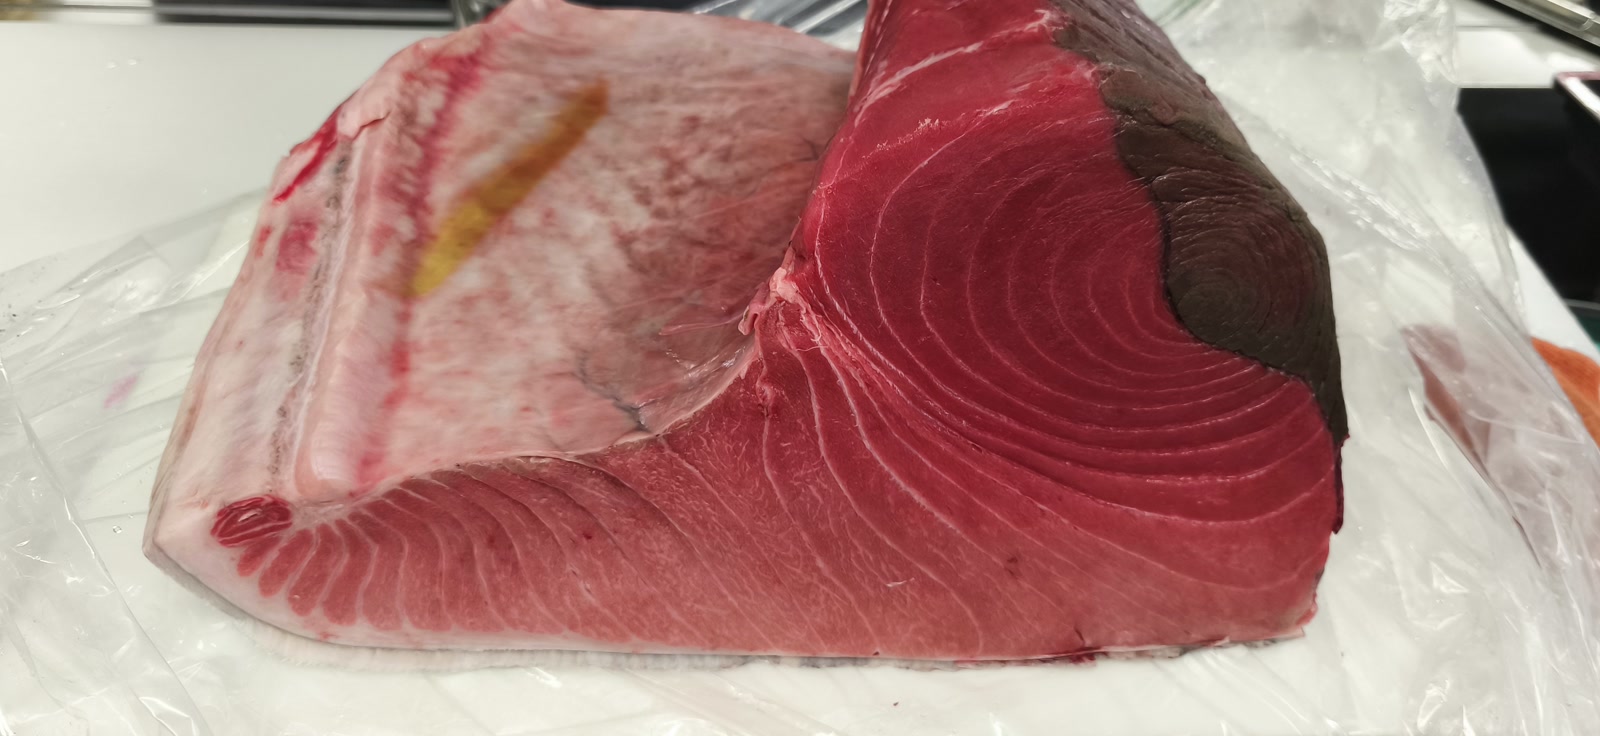
In most restaurants, tuna arrives already cut into frozen saku, so cooks rarely work from a block. But in larger Japanese restaurants, sushi shops, and kitchens with an ultra-low-temperature freezer, you do get blocks. The block in this article cost about 70,000 yen, so it is not something you want to waste.
This is not a difficult technique. If you follow the basics, anyone can learn it. Because most people handle a block so rarely, it helps to picture the cuts in your head first. Done well, cutting your own saku cuts down on waste and gets more usable fish out of every block.
What is saku? Tuna terms in plain English
Saku are the rectangular blocks cut from a tuna block, ready to use for sashimi, sushi and so on. Cutting them is called saku-dori.
Tuna has a different name at each stage of breakdown:
- Round: the whole fish, as caught
- Semi-dress: guts removed
- Dress: head and guts removed
- Fillet: cut into three pieces (two sides and the backbone)
- Loin: a fillet split into belly and back
- Block: a loin cut into smaller pieces
- Saku: a block cut into the final rectangular pieces
A few more words you will see below:
- Akami: the lean red meat
- Chutoro: medium-fatty tuna
- Otoro: the fattiest belly meat
- Chiai: the dark blood line
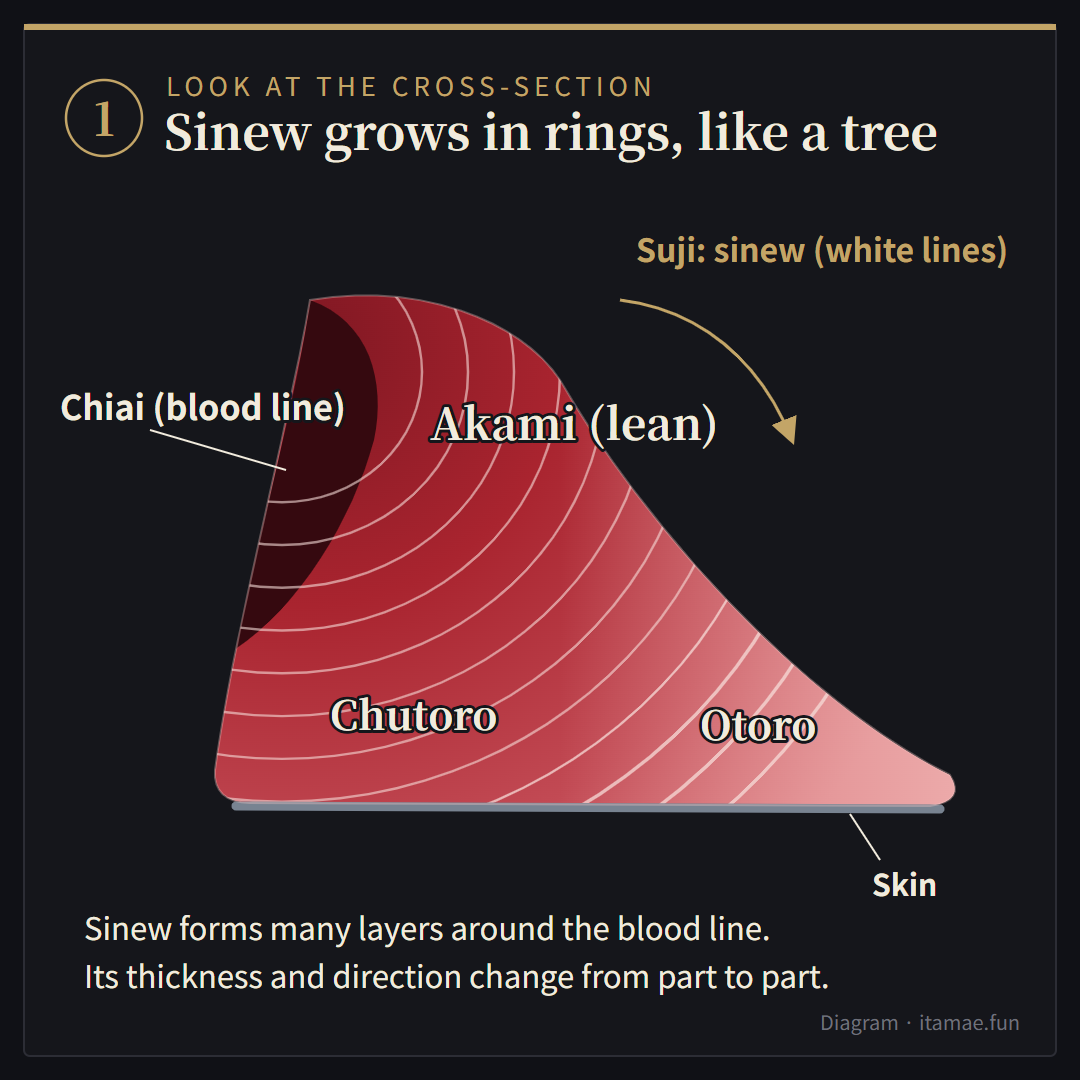
- Suji: the white sinew lines running through the meat
- Yanagiba: the long, single-bevel knife used for sashimi
The four principles of a good saku
1. Read the sinew direction
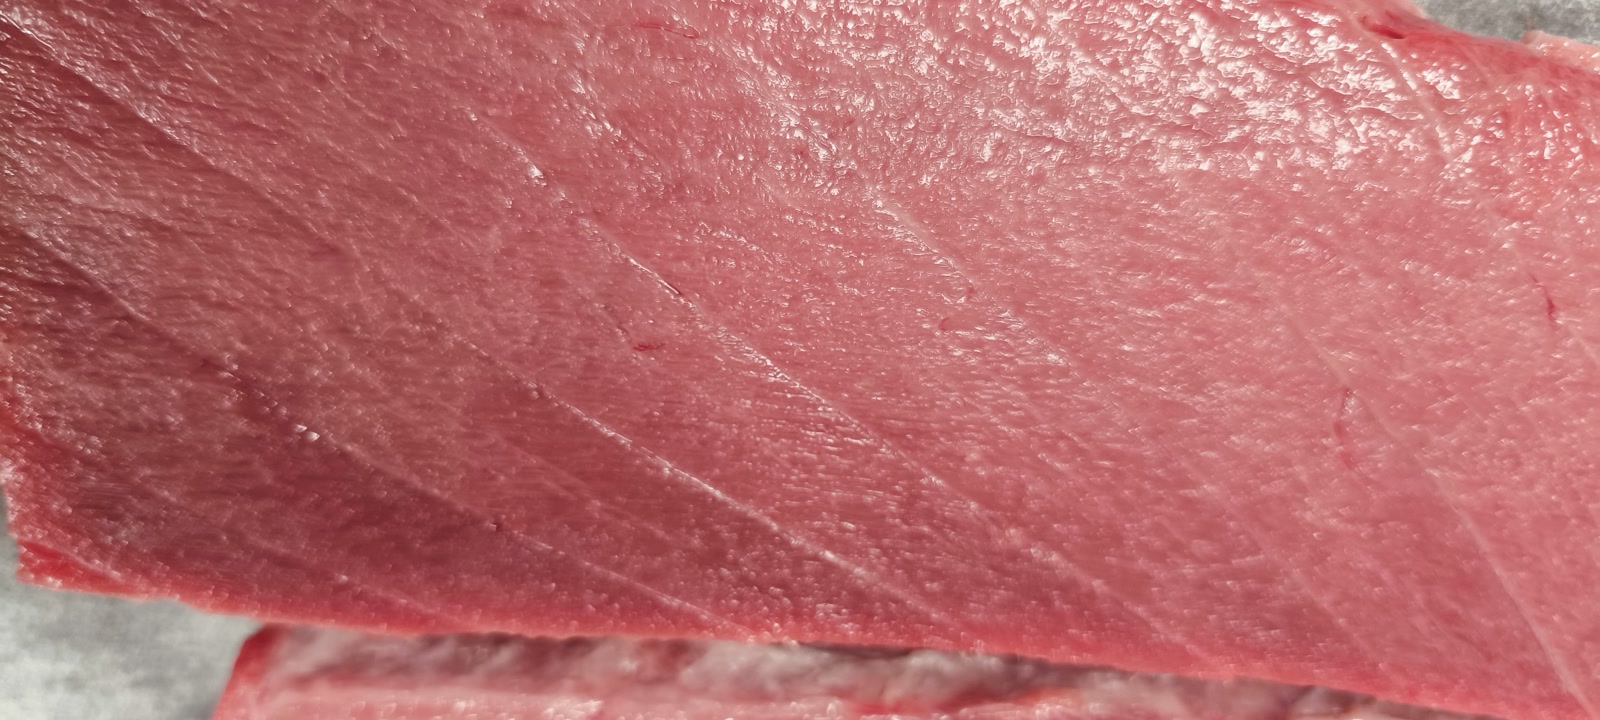
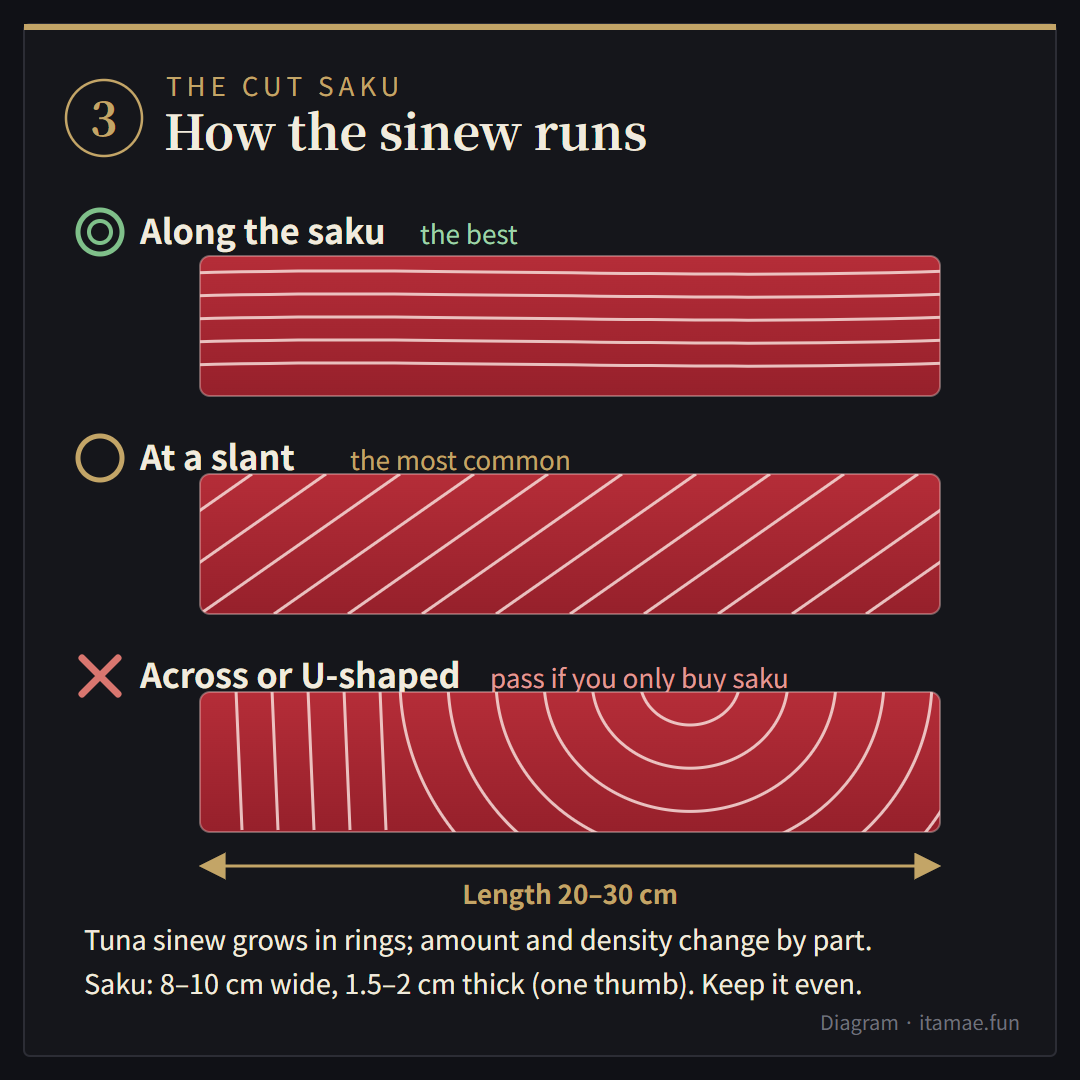
The simple version: cut the saku along the sinew, then slice the sashimi across it.
In reality, tuna sinew runs through the whole fish in layers, like the rings of a tree, and its thickness and direction change from one part to another. So the basic rule I follow is to cut saku from head to tail, along the line of the backbone.
2. Shape it for the dish
Sashimi, sushi and rice bowls (donburi) each need a different size and shape of saku. Will you slice it hirazukuri style or hegizukuri style (more on both below), or as sushi toppings? Picture the finished dish before you cut.
My basic saku size:
- Length: 20–30 cm
- Width: 8–10 cm (about four fingers)
- Thickness: 1.5–2 cm (about one thumb)
3. Keep the thickness even
If the thickness is uneven, it affects how evenly the fish cooks when you sear or cook it, and the balance of flavor. Above all, an uneven saku is awkward to slice into sashimi and looks worse on the plate.
4. Make clean, beautiful cut faces
How it looks is part of its value. Use a knife with a long blade and try to pull through in one stroke. For a smooth face, never stop partway, and never saw back and forth.
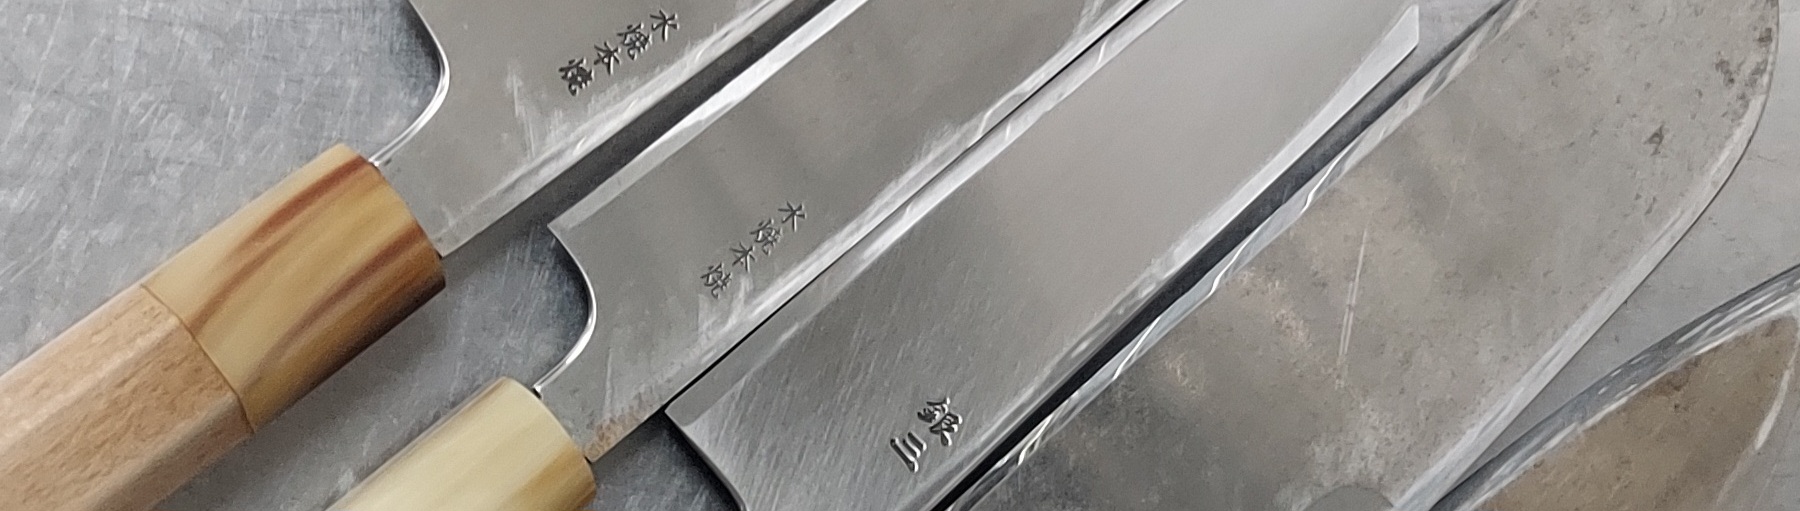
Browse yanagiba (sashimi knives) · a 270 mm yanagiba in white steel
Step by step: cutting the belly block
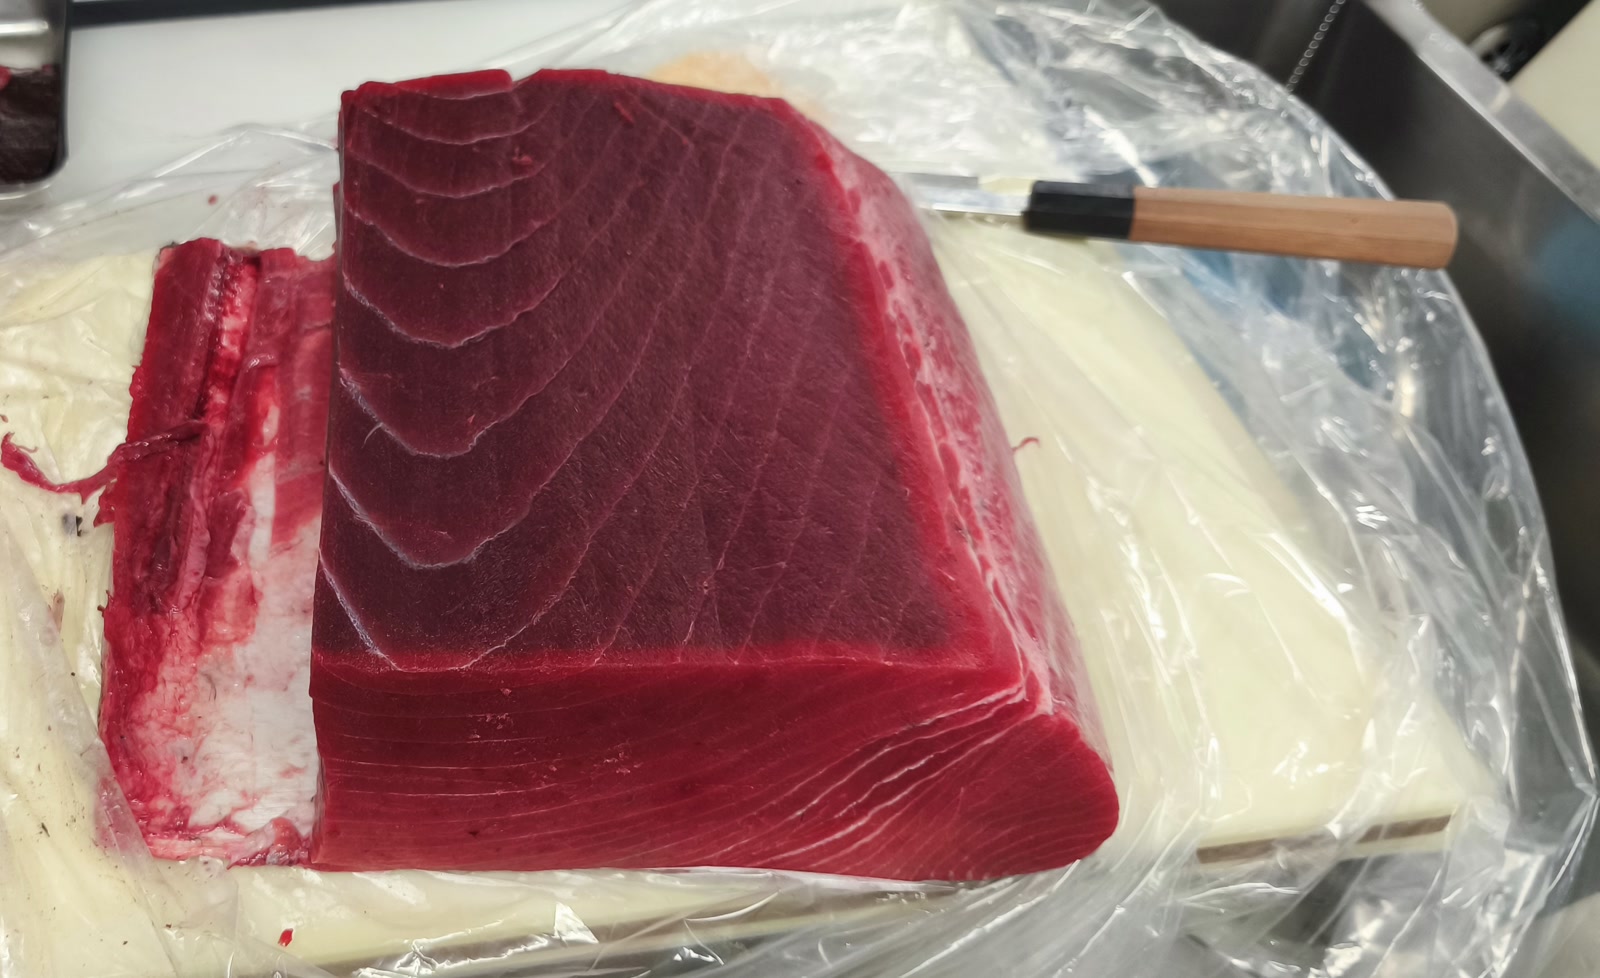
Now let’s go through a real block. I am using a belly block here. The details change a little by part, but the method is the same for the other belly block and for the back blocks.
The idea in one sentence: remove everything you don’t want (blood line, bones, skin, membrane) — we call this cleaning — and then cut rectangles along the grain.
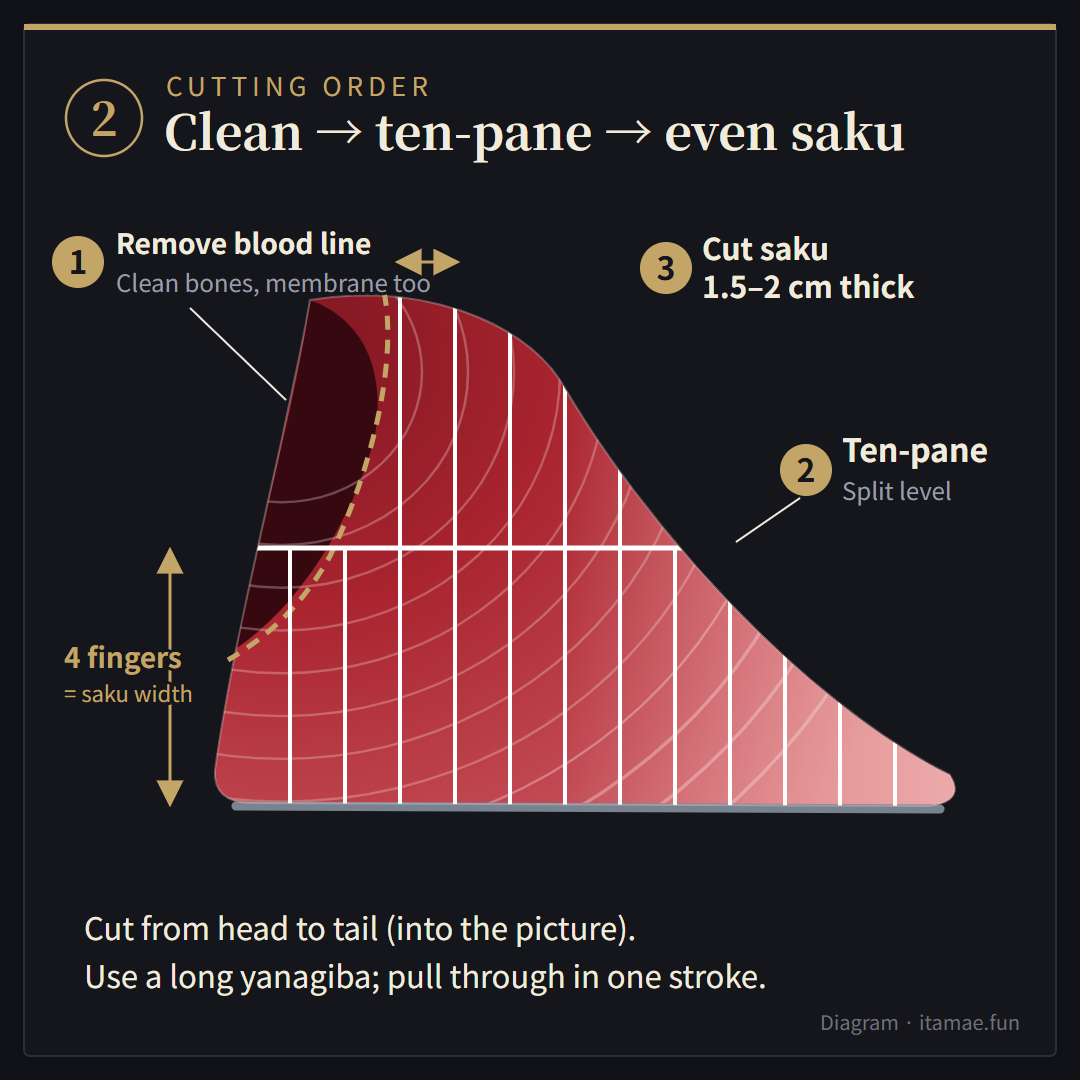
Step 1: Remove the blood line (chiai)
With a yanagiba, cut away only the blood line. Where it goes deep into the meat and is hard to reach, don’t force it. Trim those parts after the saku are cut.
Don’t throw the blood line away: it isn’t for sashimi, but simmered sweet and savory with ginger, it’s delicious.
Step 2: Remove the belly bones and belly membrane
Next, take off the belly bones and the belly membrane. At the far side, the red meat gets in the way and the knife will not go in cleanly, so do the next step (ten-pane) first and come back to it.
Step 3: Ten-pane — split the block top and bottom
Ten-pane is kitchen slang for slicing the block horizontally into an upper and a lower piece. The height of the cut should be about four fingers. That height becomes the width of your saku.
Cut decisively with the yanagiba. If you only watch the part of the blade near you, the tip tends to drop. Keep the whole knife level.
After the ten-pane, clean the belly side thoroughly again. This is the moment to do it properly, so the saku are easy to use later.
Tuna belly bones go in deep. Cut away the meat around them and pull them out with fish-bone tweezers.
Tuna caught on long-distance fishing boats is frozen right away on board. It is cut and shipped while still frozen, so the belly bones and skin are cleaned after thawing. (If you are working with frozen saku, see “How I thaw frozen saku” below.)
Step 4: Cut the akami saku
If needed, split the block top and bottom again. When my junior cook did this, the cut started level but slowly got lower toward the end. Keep checking that you stay level.
After that, just cut at a constant width. Use a long yanagiba and pull through in one stroke.
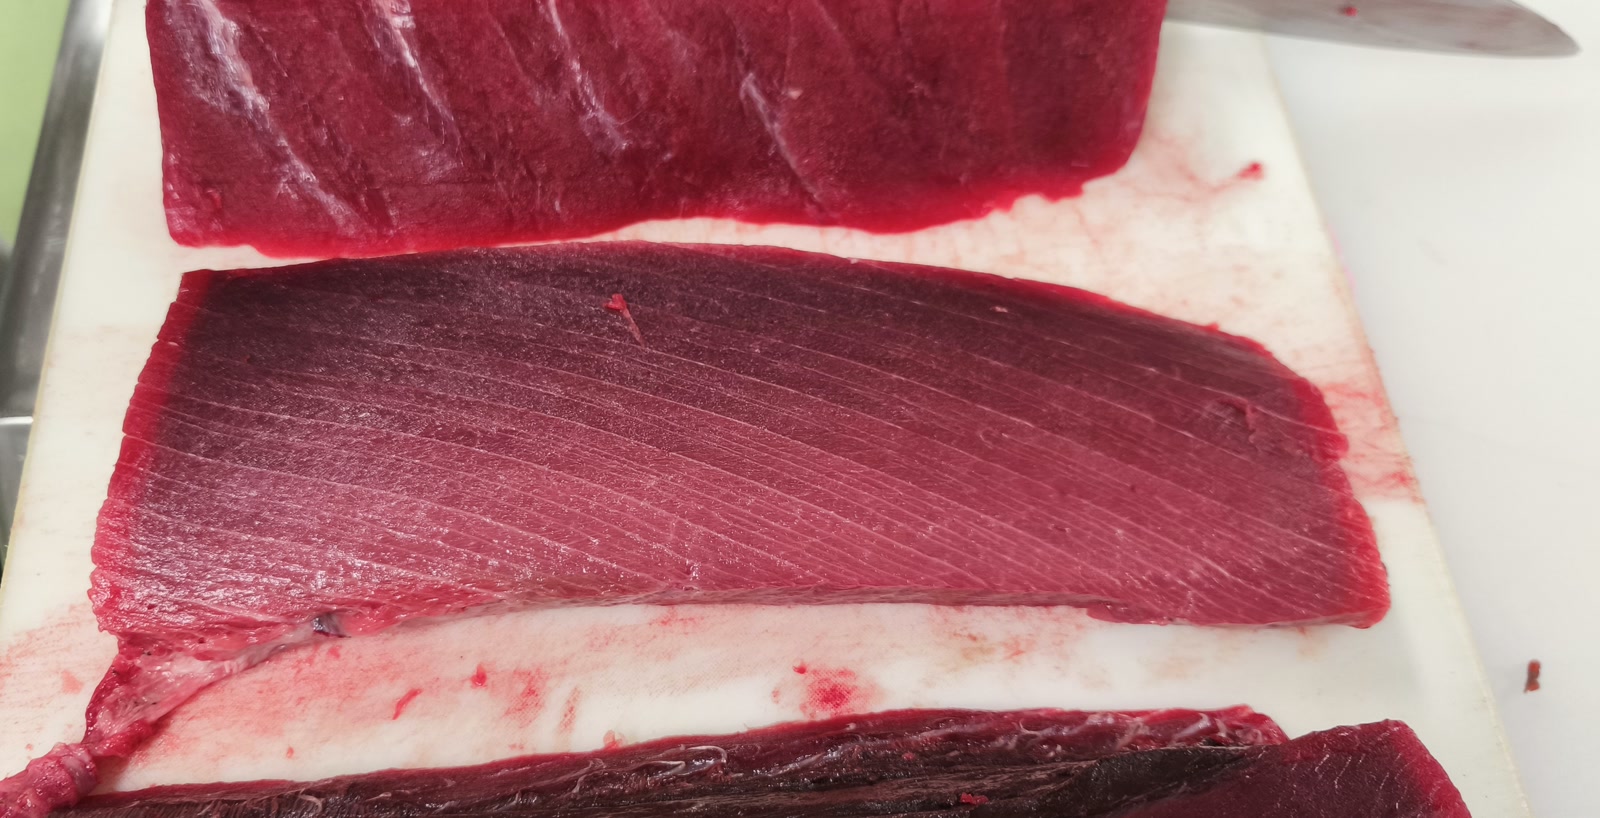
Step 5: Cut the toro saku
Once the belly bones and membrane are cleaned, cut the toro (fatty) part into pieces of the right width. Here, the width of each cut becomes the thickness of the saku. Focus on pulling straight at a constant width.
In the upper belly block, close to the head, a large bone remains that you cannot pull out. Work around it as you cut.
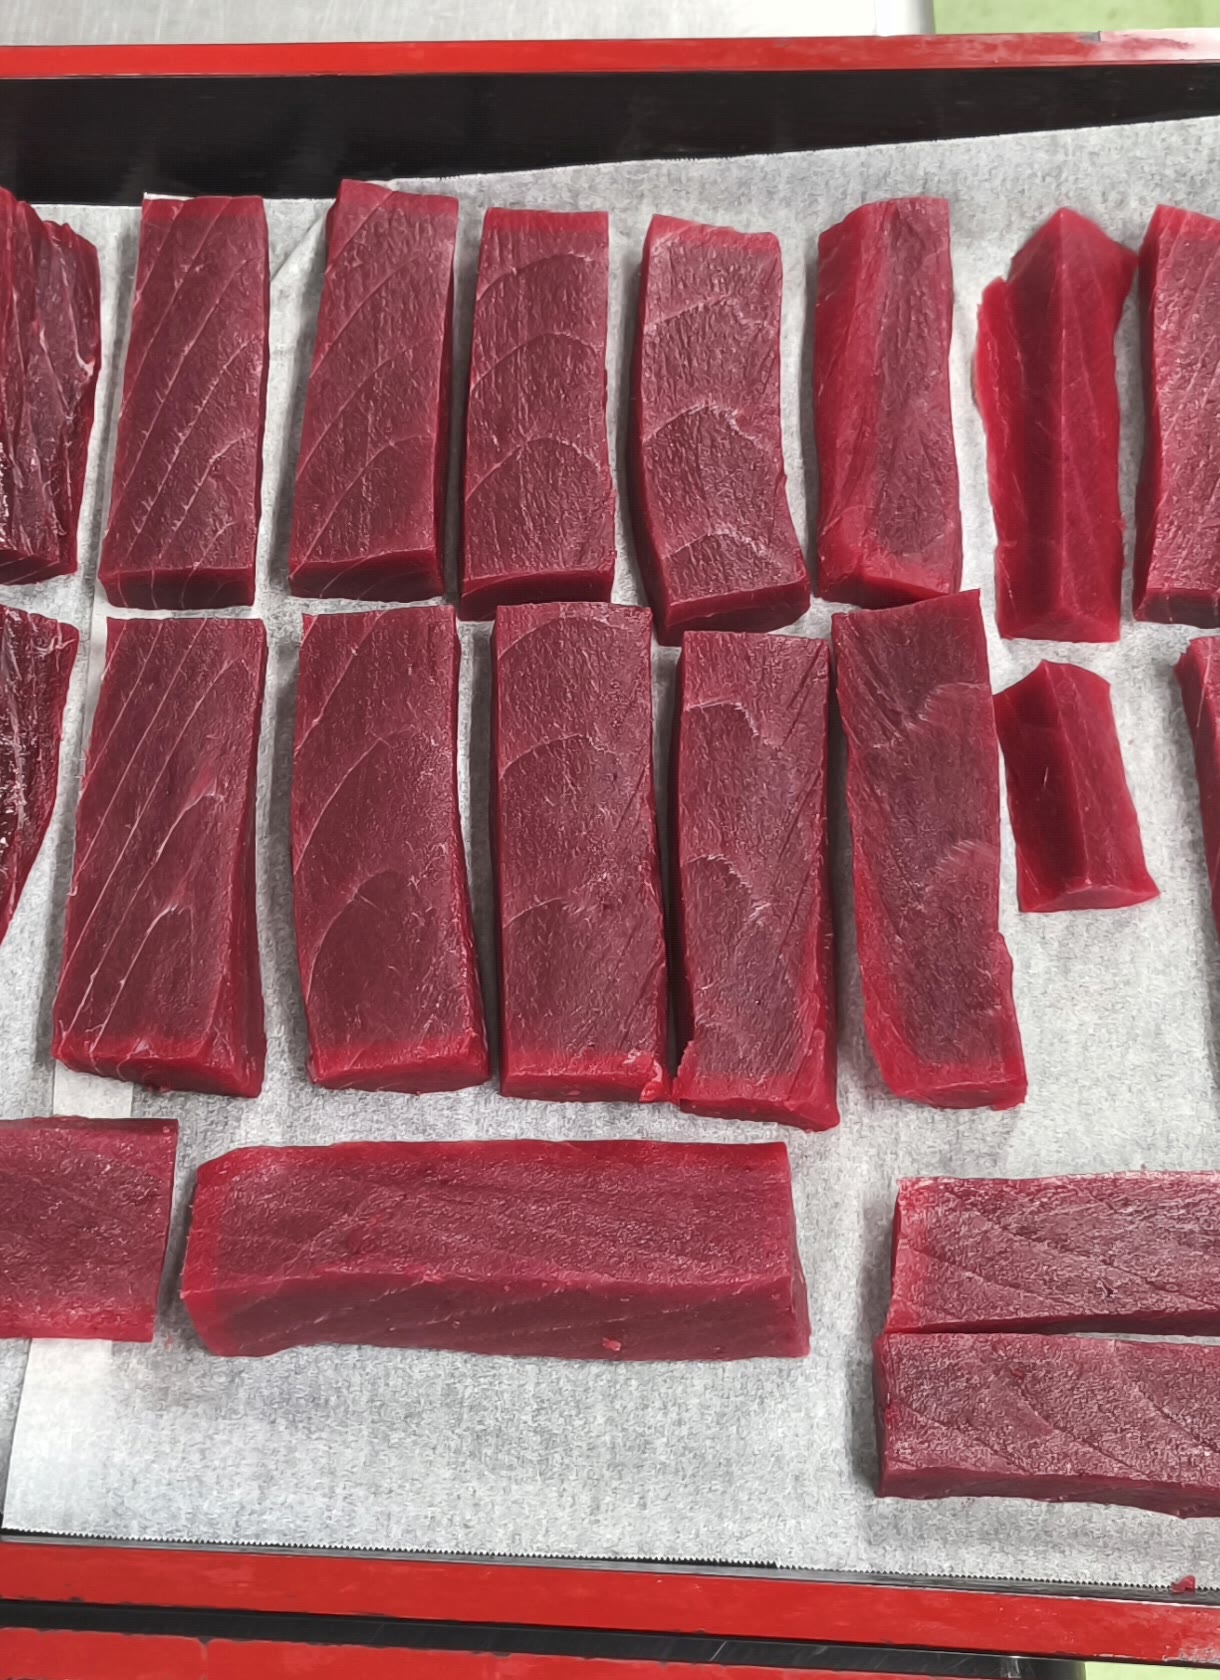
Step 6: Store the saku
In my restaurant, I cut each saku in half again at this point and keep them in an ultra-low-temperature freezer at −60°C.
At home, you won’t have a freezer like that. Pat the saku dry, wrap it in kitchen paper and then in plastic wrap, and keep it in the fridge. If you are eating it as sashimi, eat it the same day or the next day.
Buying saku only? Look at the sinew first
A tuna is a big fish, and its sinew runs through it in layers like tree rings. Some parts have more sinew than others, and in some parts it is packed tightly together.
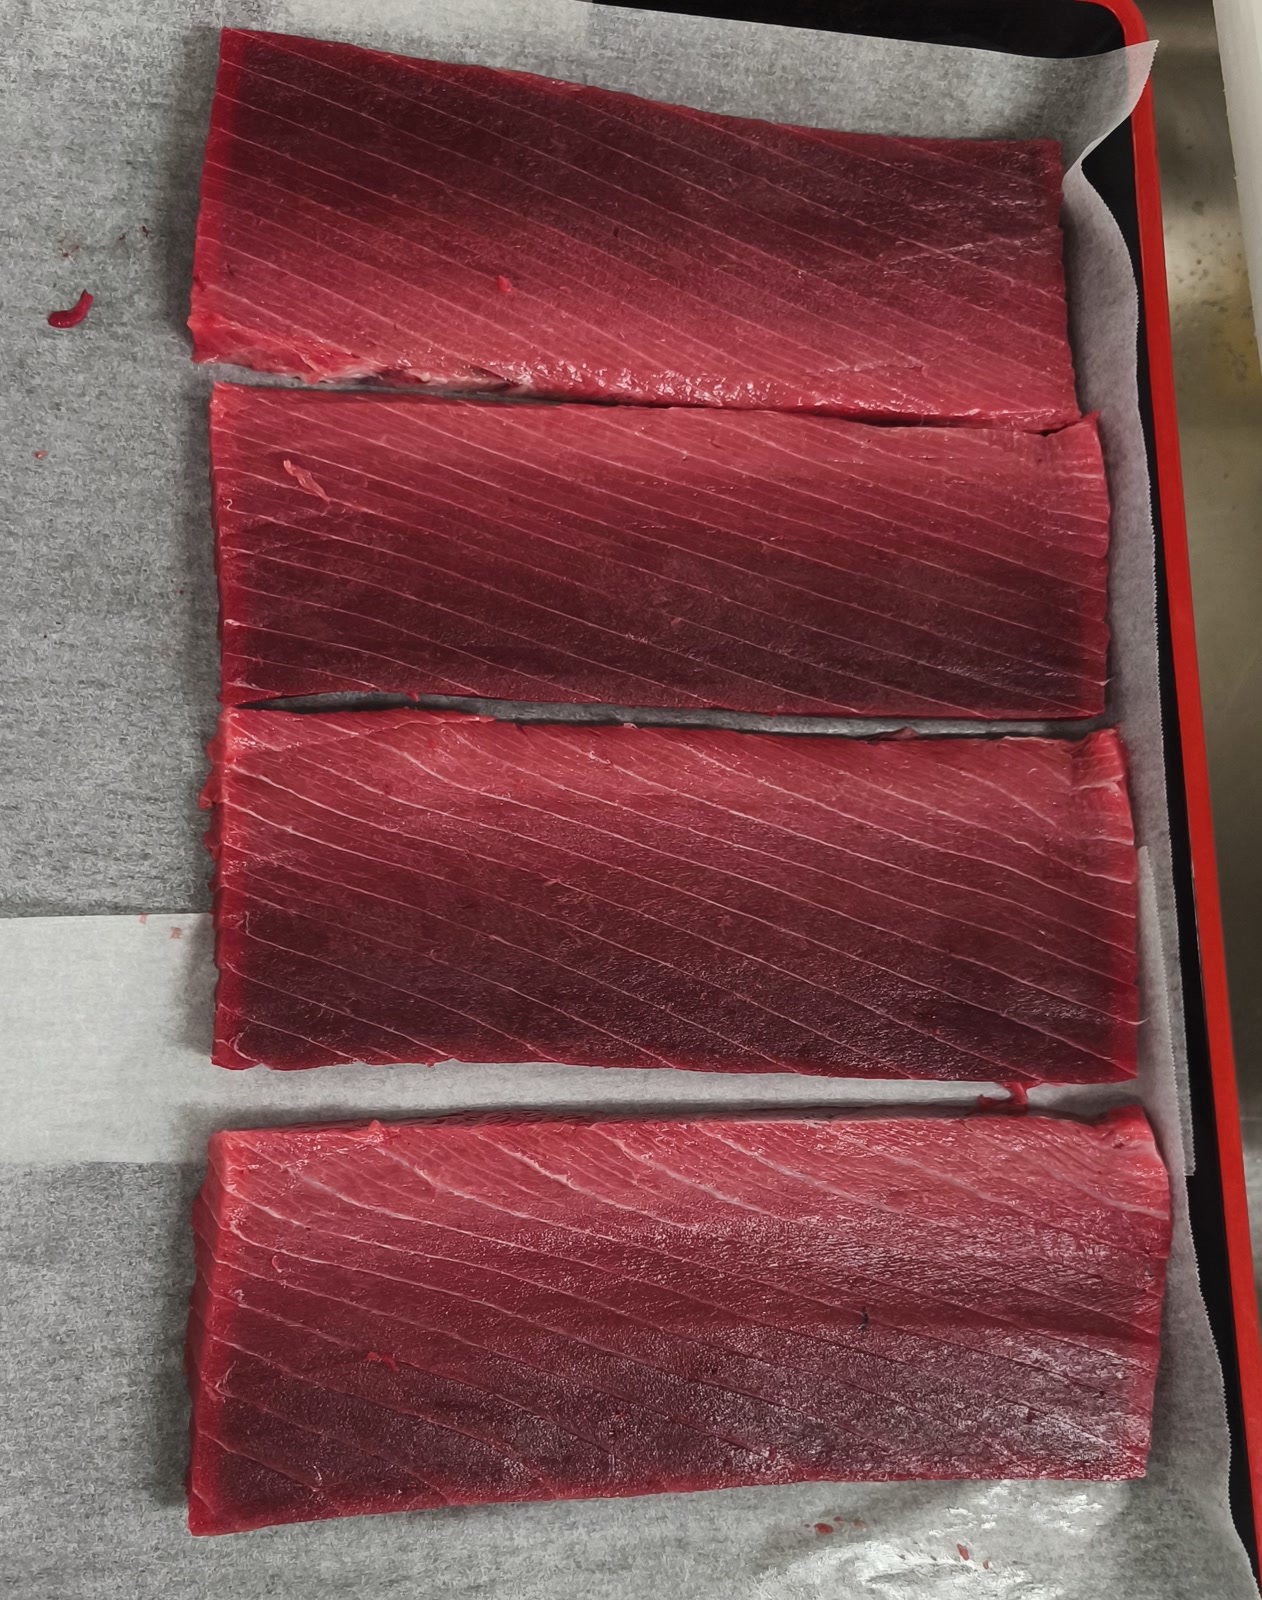
With a long, rectangular saku, the ideal is sinew running lengthwise, along the long side. Then every slice you cut crosses the sinew cleanly. Most saku you see have sinew running at a slant, and that is fine. But sometimes the sinew runs straight across the saku, or curves in a U shape. If you are only buying a saku, not cutting it yourself, I would pass on those and choose another one.
How I thaw frozen saku
Frozen saku is usually frozen on the boat right after the catch, then cut while still frozen with an electric saw. Because of that, the surface of a frozen saku always has some tuna “sawdust” on it, like the dust you get when you saw wood.
Here is how I deal with it:
- Dip a paper towel in lightly salted water and gently rub the residue off the surface.
- Wrap the saku in kitchen paper.
- Let it thaw slowly in the fridge.
Slicing sashimi: cut across the sinew
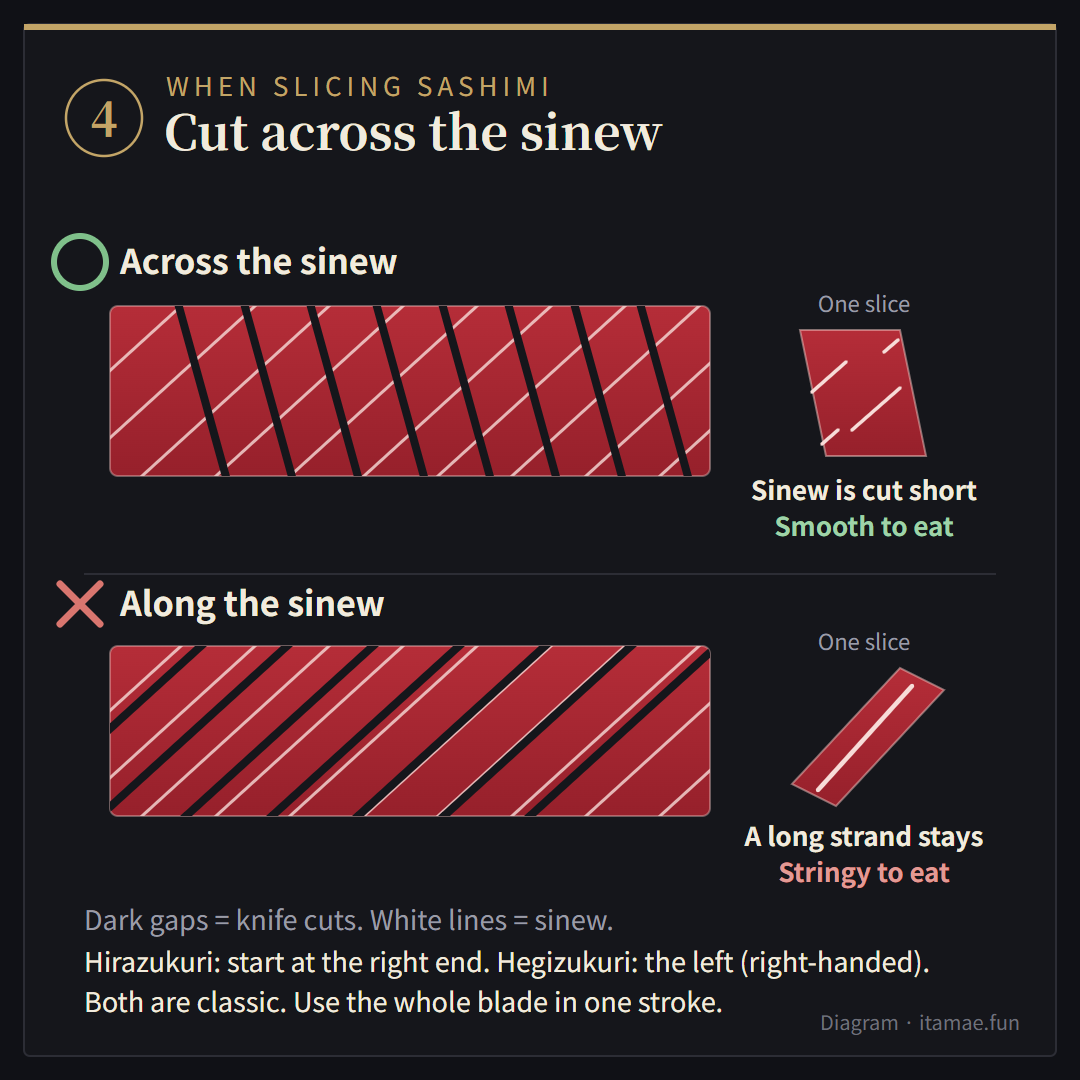
When you slice the saku into sashimi, cut across the sinew, not along it. If you slice along the sinew, long strands stay in each piece.
For a right-handed cook, there are two classic ways to do this:
- Hirazukuri: start slicing from the right end of the saku.
- Hegizukuri (also called sogizukuri): start slicing from the left end of the saku.
Both are standard, classic ways to slice sashimi. Neither one is wrong.
Cutting the back block
The basic flow for a back block is the same. There are no belly bones or membrane, so cleaning takes much less work.
- First, look at the whole block and picture where the saku will come from.
- Remove the blood line.
- Do the ten-pane, and cut off the triangular piece at the very top.
- Then, keeping level, cut off the next piece below it.
- The two pieces left at the bottom are hard to separate, so first cut wide saku across both.
- Once those saku are cut, the two pieces separate easily.
A note on food safety
When you eat tuna raw, buy fish that the seller says is meant for raw eating (often labeled “sashimi-grade”), keep it cold from the shop to your kitchen, and work with clean hands, knife and board. Return the saku to the fridge or freezer as soon as you finish cutting. Rules and labels differ by country, so follow your local food-safety guidance.
FAQ
What is the difference between a tuna block and a saku? A block is a loin cut into smaller pieces. A saku is the block cut once more into rectangular pieces that are ready to slice for sashimi or sushi.
Which way should I cut the saku? As a basic rule, cut from head to tail, along the line of the backbone. Then, when you slice sashimi, cut across the sinew.
How big should a saku be? My basic size is 20–30 cm long, 8–10 cm wide (about four fingers) and 1.5–2 cm thick (about one thumb).
Which knife should I use? A yanagiba with a long blade, so you can pull through each cut in one stroke without stopping or sawing.
A long yanagiba for one-stroke cuts
What can I do with the blood line? Don’t throw it away. Simmer it sweet and savory with ginger.
Final thoughts
Cutting saku is not a difficult skill. But because tuna is an expensive ingredient, sticking to the basics matters more than anything. Pay attention to the sinew direction, how you put the knife in, and the shape and thickness of each saku, and both the look and the taste get much better.
Don’t be afraid of mistakes. Start by learning the correct steps carefully, with your hands. And never forget the goal: someone is going to enjoy eating it. Have fun cutting.
Read next
- Is Fugu Safe? A Licensed Fugu Chef Explains
- Kaiseki Explained by an Itamae: The Course Order and the Words on the Menu
- Sitting at a Japanese Counter: What Makes an Itamae Happy (and What Doesn’t)
- Japanese Knife Types and Names, Explained by a Working Itamae
- How to Sharpen a Single-Bevel Japanese Knife, Step by Step