By Chef Paprika
This article contains affiliate links. If you buy through them, itamae.fun may earn a small commission at no extra cost to you.
When a young cook in my kitchen says, “I’m going to buy a new knife,” the next question is almost always, “So what is shirogami? What is aogami?” Fair question. There are so many Japanese knives, and so many steels, that it is hard to know where to start.
I have worked as an itamae, a chef of Japanese cuisine, for 23 years. I have cooked in ryotei (traditional high-end Japanese restaurants) in central Tokyo, in a Michelin-starred restaurant, and in a members-only club. I also hold a Tokyo fugu (pufferfish) license. A knife is the most important tool I own.
And I will be honest: when I was young, I did not know much. I chose badly, and two knives ended up retired in a drawer. Choosing the wrong knife is stressful, and you end up buying again.
This guide is for home cooks and cooks outside Japan, and for travelers who want to buy a knife in Japan, in places like Kappabashi in Tokyo or Sakai near Osaka. I will walk you through how Japanese knives are built, which steels they use, what each knife is for, the names of the parts, and how to choose your first one.
Japanese Knife Types at a Glance
Here is the quick reference. Below the table I explain each knife in more detail.
| Name (romaji) | Kanji | Bevel | Main use |
|---|---|---|---|
| Yanagiba | 柳刃 | Single | Slicing sashimi in one long pull (Kansai style; now the most common everywhere) |
| Takohiki | 蛸引 | Single | Slicing sashimi; straight Kanto-style blade (not just for octopus) |
| Sakimaru sashimi knife | 先丸刺身包丁 | Single | Slicing sashimi; tip shaped like a Japanese sword |
| Tessa / fuguhiki | てっさ / ふぐ引 | Single | Paper-thin slices of fugu |
| Deba | 出刃 | Single | Breaking down whole fish, cutting through bones |
| Ai-deba | 相出刃 | Single | Filleting and cutting fish into blocks (between a deba and a yanagiba) |
| Mioroshi deba | 身卸し出刃 | Single | Filleting; also for removing fugu skin |
| Usuba | 薄刃 | Single | Vegetables: precise cuts and katsuramuki (peeling daikon into a thin sheet) |
| Mukimono | むきもの | Single | Small, detailed vegetable work and decorative cuts |
| Gyuto | 牛刀 | Double | Meat, fruit, citrus: an all-rounder (Western-style knife) |
| Santoku | 三徳 | Double | Meat, fish and vegetables: the all-purpose knife of Japanese homes |
| Petty knife | ペティナイフ | Double | Small jobs and fine decorative cuts (blade 15 cm or less) |
| Imokiri | 芋切り | Double | Very thin blade for nagaimo, watermelon and other foods that split |
| Hamokiri | 鱧切り | Single | Cutting through the many small bones of hamo (pike conger) |
| Unagi-saki | 鰻裂き | Single | Opening eel, anago and loach (shape varies by region) |
Honyaki vs. Kasumi: How a Japanese Knife Is Built
If you sort traditional Japanese knives by how they are built, there are two families. They differ in sharpness, maintenance and price, so it matters which one you choose.
| Honyaki (本焼) | Kasumi (霞) | |
|---|---|---|
| Made of | Steel only | Hard steel joined to soft iron |
| Sharpness | Very sharp, lasts long | Good, but softer than honyaki |
| Sharpening | Hard and slow; needs skill and good stones | Easy; takes to the stone well |
| Chipping | Chips more easily on impact | Tough and hard to chip |
| Price | High: about 3 to 5 times a kasumi | Relatively affordable |
| Who it suits | Experienced cooks | Beginners and daily work |
Honyaki: one steel, made for experts
A honyaki knife is made only from pure steel, usually shirogami (White Paper steel) or aogami (Blue Paper steel). It is mostly used for sashimi knives like the yanagiba and fuguhiki, where you need a very sharp edge.
Because it is a single steel, the blade does not warp easily. It is hard, so the sharp edge lasts. Honyaki knives are also known for the beautiful wave pattern (hamon) along the blade. But they are hard to make, which is why they are expensive. They are slow to sharpen, need real skill and good stones, and they can chip if you knock them.
There are two ways to quench a honyaki in the hardening step. Mizu-yaki (water quench) cools the blade very fast, so it becomes harder, but it is more difficult for the smith. Abura-yaki (oil quench) cools more gently and fails less often.
For an itamae, a honyaki is a special knife. It is the one you want even when it costs a lot. It pushes you to focus and to get better at your work.
Kasumi: the everyday workhorse
A kasumi knife joins two metals. The back side of the edge is hard, shiny steel. The front side is tough, soft iron with a misty, “hazy” look. Kasumi means mist.
Kasumi knives are tough and hard to chip, easy to handle, and easy to sharpen. They are also simpler to make, so they cost less. The downsides: the two metals have different hardness, so the blade can warp, and the edge is not as sharp as a honyaki.
Even after 23 years as an itamae, kasumi knives are the ones I use most, by far. A beginner learns to handle knives on a kasumi, and a veteran still uses one every day.
Steel Types: Carbon Steel vs. Stainless
Next, you can sort knives by steel. Roughly, there are two choices: carbon steel, which is very sharp but rusts, and stainless steel, which resists rust and needs less care.
A quick note on terms I will use:
- Hardness (HRC): how hard the steel is. Harder steels tend to hold an edge longer.
- Edge retention: how long the edge stays sharp.
- Toughness: how well the steel resists chipping.
In my experience, harder steels tend to hold an edge longer, but they are also harder to sharpen and chip more easily.
Carbon steel (hagane)
Carbon steel is the traditional steel of Japanese knives. You could say it is where every itamae starts.
- Good: very sharp, easy to sharpen, and with proper care it can last a lifetime.
- Bad: it rusts quickly from acid and water, it chips more easily, and rough handling shortens its life.
Most Japanese carbon steel is Yasugi steel from Hitachi Metals (now Proterial). Its grades are named after colored papers that were once stuck on the steel as labels, like sticky notes: Yellow (kigami), White (shirogami), Blue (aogami). White is a very pure carbon steel. Blue is White with chromium and tungsten added, for longer edge life. Prices generally rise in that order.
| Steel | Kanji | In my experience (chef’s view) |
|---|---|---|
| Yellow #2 | 黄紙2号 | The base steel. Mainly for home knives and cooking schools. Professional itamae basically do not use it. |
| White #2 | 白紙2号 | Very pure. A good balance of sharpness and easy sharpening, and fairly friendly for beginners. The reference point for other steels. Reasonably priced and good enough for professional work. |
| White #1 | 白紙1号 | More carbon, harder. Said to be “the sharpest knife.” Hard to heat-treat, so it depends on a skilled smith. Weak against impact: handle with care. |
| Blue #2 | 青紙2号 | White #2 with chromium and tungsten added. Holds an edge for a long time, tough, and leaves a smooth, beautiful cut surface. |
| Blue #1 | 青紙1号 | A harder version of Blue #2. Cuts without force, so it does not crush the food. Edge lasts very long, but sharpening is difficult and needs good stones. |
| Blue Super | 青紙スーパー | The top of the carbon Yasugi steels. Barely loses its edge. But it takes a lot of work to sharpen, chips easily, and a chip is very hard to fix yourself. |
Stainless steel
Stainless steel has 10.5% or more chromium, which makes it resist rust.
- Good: little rust, so less work; chips less than carbon steel; many choices for every budget and purpose.
- Bad (in my experience): not as sharp as carbon steel, and it does not take to the stone as well, so it is harder to sharpen.
| Steel | Kanji / name | In my experience (chef’s view) |
|---|---|---|
| Molybdenum steel (for example AUS-8) | モリブデン | Strong against rust, easy to care for. Common in home knives. Many itamae own a gyuto in this steel. |
| Ginsan (Silver #3) | 銀3 | Stainless that feels like carbon steel: sharp, rust-resistant and easy to sharpen. Many itamae love it. (As far as I know, no silver paper was ever used, despite the name.) |
| VG-10 | V金10号 | Well balanced and very popular. Holds an edge long. There are many fakes, so buy from a shop you trust. |
| Cobalt Special | コバルトスペシャル | A very high-end stainless with even structure. Few itamae own one. |
| SG2 (Super Gold 2) | SG2 | A powdered stainless high-speed steel, in the maker’s words. Extremely sharp with excellent edge life, but difficult to sharpen. |
A note on hardness. The steel makers publish a minimum hardness after heat treatment: HRC 60 or more for Yellow, White and Blue steels, and 59 or more for Ginsan (Hitachi Metals, now Proterial); 60 or more for VG-10 and 62 or more for SG2 (Takefu Special Steel). These are the maker’s values for the steel, not for a finished knife; the notes in the tables above are my own experience as a chef. The final hardness of a knife depends on how the smith heat-treats it, so two knives of the same steel can differ.
Knives by Use: Fish, Vegetables, All-Purpose and Specialist
Finally, you can sort Japanese knives by what they are for. There are four groups, and each comes in many shapes and sizes.
I am told that in Kansai (the Osaka and Kyoto area), many restaurants have “house knives,” so cooks do not often buy their own. In Kanto (the Tokyo area), cooks normally bring their own. One itamae may own more than 20 knives, each costing anywhere from tens of thousands of yen to more than a hundred thousand yen.
Sashimi knives: yanagiba, takohiki, tessa
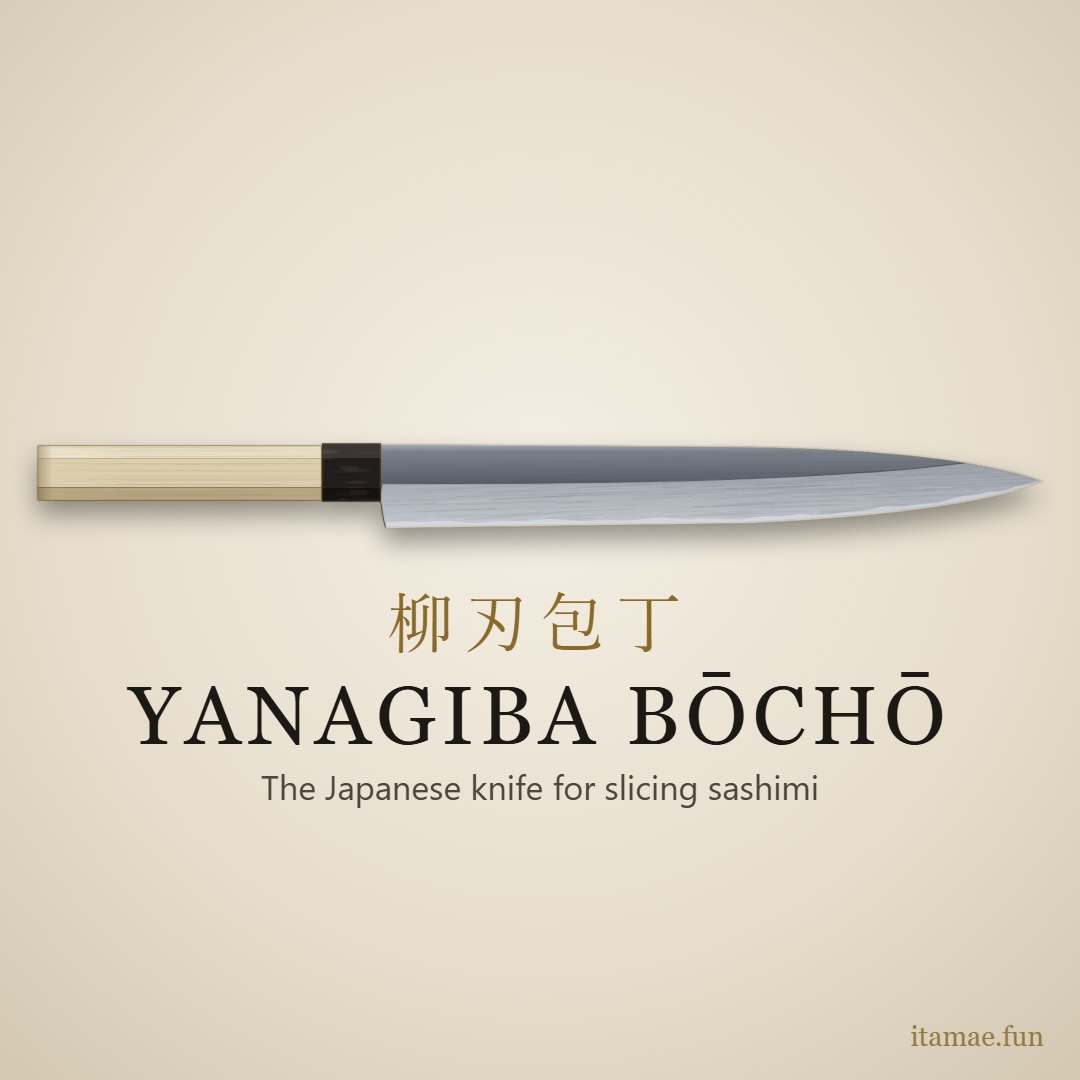
- Yanagiba (柳刃): Kansai style, but now by far the most used in Kanto too. A long, gently curved blade lets you slice a piece of sashimi in one pull.
- Takohiki (蛸引): Kanto style, with a straight blade. Few Tokyo cooks use it now. And no, it is not only for octopus (tako).
- Sakimaru sashimi knife (先丸): A tip like a Japanese sword, with a curved spine.
- Tessa / fuguhiki (てっさ): For paper-thin fugu sashimi. Fugu flesh is firm, so this knife flexes. It is narrower than a yanagiba, with a thinner spine.
The yanagiba (柳刃包丁): the Japanese knife for slicing sashimi.
Takohiki (蛸引): the Tokyo-style knife for slicing sashimi.
Fish-butchering knives: deba, ai-deba, mioroshi
- Deba (出刃): Heavy and thick. It cuts through fish bones, and sometimes poultry like chicken or quail. There are many sizes; choose by the fish you work with.
- Ai-deba (相出刃): A deba shaped closer to a yanagiba. You can use it from filleting all the way to cutting blocks (saku).
- Mioroshi deba (身卸し): Even closer to a yanagiba: thinner and longer. Also used to remove fugu skin.
The deba (出刃包丁): the Japanese knife for breaking down whole fish.
Vegetable knives: usuba and mukimono
- Usuba (薄刃): Square in Kanto style; in Kansai the tip curves down (the kamagata shape). Used mainly for precise cuts and katsuramuki. The edge must be sharpened perfectly straight, so it is one of the hardest knives to sharpen.
- Mukimono (むきもの): A smaller, thinner usuba with an angled tip. It moves easily for detailed work like six-sided peeling of taro (roppo-muki) and decorative cuts.
The usuba (薄刃包丁), Kanto style with a square tip: the Japanese knife for cutting and peeling vegetables.
Kamagata usuba (鎌形薄刃): the Kansai-style knife for cutting and peeling vegetables.
The mukimono (むき物包丁): the Japanese knife for decorative vegetable carving.
All-purpose knives: gyuto, santoku and petty
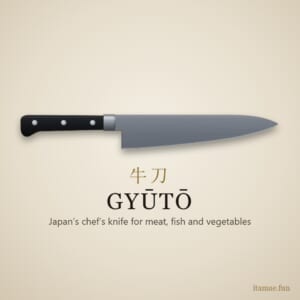
- Gyuto (牛刀): A Western-style chef’s knife, but it works hard in Japanese kitchens too. Handles come in Japanese and Western styles. In stainless, it handles meat as well as fruit and citrus, because it stands up to acid.
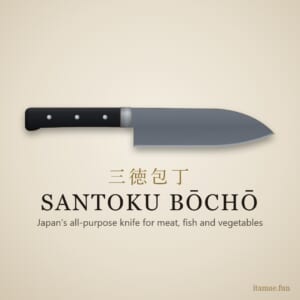
- Santoku (三徳): The all-purpose knife you will find in most Japanese homes. The name means “three virtues”: it handles meat, fish and vegetables. It is usually shorter than a gyuto and easy to control, which is why it is my pick for a first knife (more below).
- Petty knife: A small knife, 15 cm blade or less, for fine decorative cuts and quick jobs.
Gyuto (牛刀): Japan’s chef’s knife for meat, fish and vegetables.
Petty knife (ペティ): the small all-rounder for peeling and fine work.
Specialist knives: imokiri, hamokiri, unagi-saki
- Imokiri (芋切り): A double-edged, very thin vegetable knife. It stops nagaimo or watermelon from splitting the moment the blade goes in.
- Hamokiri (鱧切り): A single-bevel knife: long, thick and heavy. Only for honekiri, cutting through the countless small bones of hamo. It takes high skill: you must leave just the skin uncut.
- Unagi-saki (鰻裂き): For opening loach, anago and eel. The shape changes a lot by region. In Kanto, eel is mostly opened from the back, because opening the belly reminds people of seppuku.
The hamokiri (鱧切り包丁): the Japanese knife for the fine bones of pike conger.
Edo-style unagi-saki (江戸型の鰻裂き): the Edo-style knife for opening eels.
Names of the Parts of a Japanese Knife
When I teach a young cook how to break down a fish, I need words like “the tip” or “the heel.” If you do not know the names, you cannot follow the explanation. Here are the ones worth learning.
| Part | Kanji (reading) | What it is |
|---|---|---|
| Tip | 切っ先 (kissaki) | The pointed end. For fine work like squid “noodle” cuts and decorative cuts. |
| Curve | 反り (sori) | The curved part of the edge. Used when filleting and slicing sashimi. |
| Edge line | 刃線 (hasen) | The whole cutting edge. Use all of it in a long motion so you do not crush the food’s cells. |
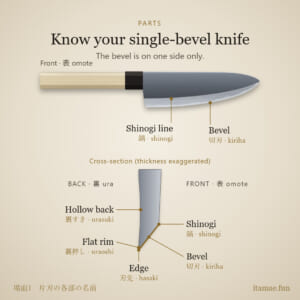
| Bevel | 切刃 (kiriha) | The angled face from the shinogi line down to the edge. |
| Shinogi line | 鎬筋 (shinogi-suji) | The line where the bevel meets the flat face and the angle changes. |
| Spine | 峰 / 棟 (mine / mune) | The back of the blade. |
| Heel | 顎 (ago) | The corner where the edge ends. Handy for removing potato eyes. |
| Back hollow | 裏すき (urasuki) | The hollow on the back. The lifeline of the knife’s sharpness, and it means you do not have to grind the whole back. |
| Ferrule | 口輪 (kuchiwa) | The collar at the front of the handle. Stops the blade coming loose. Usually plastic; high-end ones use water-buffalo horn. |
| Tang | 中子 (nakago) | The metal inside the handle. No glue or rivets. |
| Handle | 柄 (e) | Usually ho (Japanese magnolia) wood: easy to shape, hard to crack, good with water, not slippery. Luxury handles use ebony. |
How a Traditional Japanese Knife Is Made
Japanese knives grew out of the sword-making tradition. A handmade knife goes through three stages: forging (hard steel and soft iron are heated and hammered together, then shaped), sharpening (from a rotating wheel to finer and finer hand stones, finishing on a natural stone), and fitting the handle (the heated tang is set into the handle, which also helps stop it from rotting).
The most important step is quenching. The blade is heated to around 800°C and cooled fast in water or oil to make it hard. On a honyaki, the hamon appears here. The smith judges the temperature by the color of the hot steel, and even a master does not succeed 100% of the time. Then the blade is tempered at around 200°C so it becomes tougher and chips less.
How to Choose Your First Japanese Knife
What you need depends on your work, your experience, whether you are good at sharpening, even the size of your kitchen. Before you buy, ask yourself what you care about most. “I want a knife that does not rust, more than one that is super sharp.” Or, “I want a beautiful, mirror-finished honyaki.” Choose for your purpose and your budget.
From everything above, here is how I would think about it:
- If you are a beginner, start with kasumi, not honyaki. It is tough, easy to sharpen, and the knife I still use most.
- If you do not want to worry about rust, choose stainless. Ginsan feels close to carbon steel and is easy to sharpen. If you choose VG-10, buy from a trusted shop because of fakes.
- If you want to learn carbon steel, White #2 is a balanced, reasonably priced steel that is good enough for professional work.
- Leave Blue Super, White #1 and honyaki for later, when your sharpening skills and stones are ready.
My pick for your first knife: a santoku
If you cook at home outside Japan and want just one Japanese knife, I recommend a santoku (三徳). It is the all-purpose knife Japanese home cooks use more than any other. For a proper Japanese-made santoku, expect to pay about ¥10,000 to ¥20,000.
Santoku (三徳): Japan’s all-purpose knife for meat, fish and vegetables.
Buying a knife in Japan: Kappabashi and Sakai
Many travelers buy their knife in Japan, at Kappabashi, the kitchen-tool street in Tokyo, or in Sakai, the knife-making city near Osaka.
Here is what I would do when buying there:
- Tell the staff what you want to cut and what your budget is. Then they can show you the right knife.
- Have your name engraved on the blade. It makes a lovely souvenir.
- Ask them to sharpen it (put a fresh edge on it) when you buy it.
- Ask them to pack it for travel, in a saya (sheath) or a box.
Bringing your knife home
Here is a general airline-security fact: knives are not allowed in carry-on luggage. Always put your knife in your checked baggage, packed in the saya or box the shop gave you. Rules differ by airline and country, so always check with your airline and the customs rules of your home country before you fly.
Rather not fly with a knife? Browse Japanese knives that ship worldwide
FAQ
What is the difference between a yanagiba and a takohiki? Both are sashimi knives. The yanagiba is Kansai style with a long, curved blade, and it is now the most common everywhere. The takohiki is the straight Kanto style, and few cooks in Tokyo use it today. Despite the name, it is not only for octopus.
Does a carbon-steel knife really rust? Yes, quickly, from water and acid. With careful handling it can last a lifetime, but if you want less work, choose stainless.
Should a beginner buy honyaki? I would not. Honyaki is expensive (about 3 to 5 times a kasumi), slow to sharpen and chips on impact. Start with a kasumi knife and come back to honyaki later.
Can I take a Japanese knife in my carry-on bag? No. Knives go in checked luggage. Check your airline’s rules and your home country’s customs rules before you travel.
Choosing a Knife Is the First Step
For an itamae, a knife is life itself. A good knife makes the food look better and keeps its freshness and flavor. It makes your work faster, lifts your motivation, and makes cooking more fun.
Do not do what I did and buy knives you do not need. Use this guide to find a knife you will love and use for years.
Santoku · gyuto · yanagiba · deba · usuba
My pick for a first knife: a stainless VG-10 santoku · or a Blue #2 carbon-steel santoku
More from my kitchen:
- Gyuto vs Santoku (vs Nakiri and Bunka): Which Japanese Knife Should You Choose?
- How to Buy a Japanese Knife in Japan: A Working Itamae’s Guide for Travelers
- How to Cut a Tuna Block into Saku (Sashimi Blocks): see how I use a yanagiba and deba on a block of tuna.
- How to Sharpen a Single-Bevel Japanese Knife, Step by Step: keep your deba and yanagiba sharp on whetstones.
- Is Fugu Safe? A Licensed Fugu Chef Explains
- Kaiseki Explained by an Itamae: The Course Order and the Words on the Menu
- Sitting at a Japanese Counter: What Makes an Itamae Happy (and What Doesn’t)